Whip stitch is a quick, neat method for joining crochet squares, motifs and seams together. It still allows for a little give at the seam, without gaping holes.
Here’s what I cover in this blog post:
- When to Use Whip Stitch Joins
- How to Join Crochet with Whip Stitch
- Anatomy of a Crocheted Square – learn what bit joins to what
When to Use Whip Stitch Joins?
- If panels, squares or motif edges are the same colour as the joining yarn (a contrast colour will be seen).
- If you want an obvious but neat contrast colour join to be seen.
- When you need a sturdy join – think blankets, cushions and garments!
- If you are lacking in sewing confidence. This is the easiest stitch to do because of the position of the needle and the seams.
Here’s a close up of a whip stitch join. The two at the top were whip stitched with the same yarn the squares were crocheted in. The two at the bottom were whip stitched in the same yarn, but in a contrast colour.

how to Join Crochet with Whip Stitch:

Join 1 Step 1 – Identify ‘right sides’ of crochet. Cut a length of yarn 2 x the length of the piece that needs to be joined and thread with a tapestry needle.

Join 1 Step 2 – Place right sides of squares together so wrong sides are facing out.
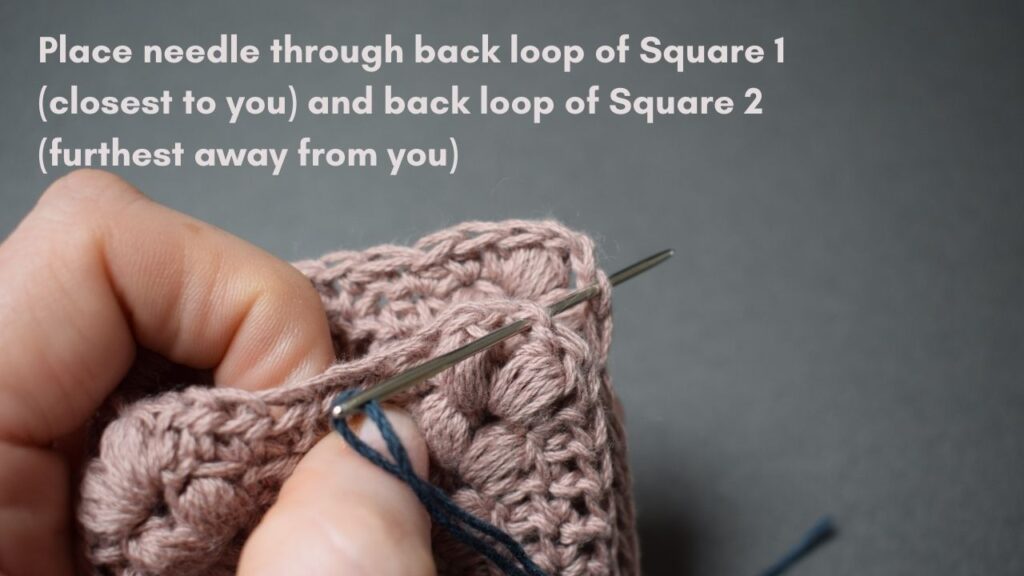
Join 1 Step 3 – Place needle from front to back through back loop of first stitch of Square 1 (square and loop closest to you) and from front to back through back loop of Square 2 (square and loop furthest away from you). Pull through needle and yarn, leaving a 10cm/ 4” tail for weaving in. For squares with a 2 chain corner, both chains need to be sewn at this first stage.
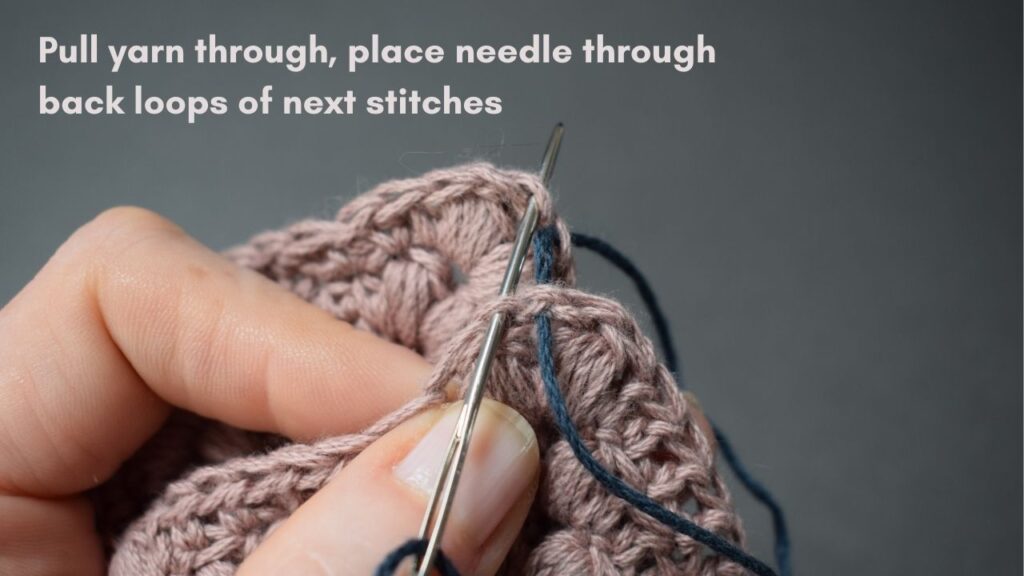
Join 1 Step 4 – Place needle from front to back through back loop of next stitch of Square 1 (square and loop closest to you) and from front to back through back loop of next stitch of Square 2 (square and loop furthest away from you). Pull through needle and yarn.
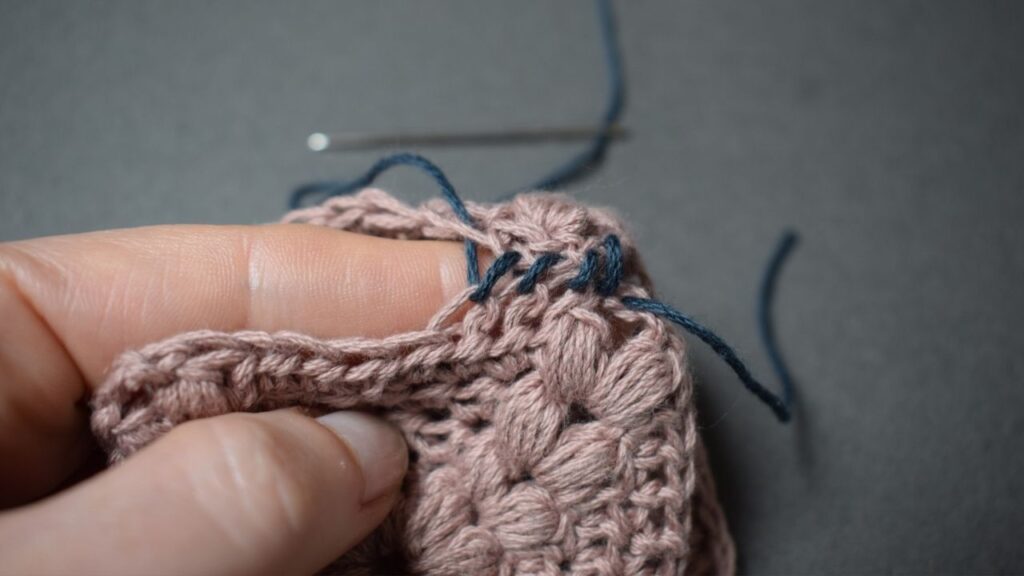
Join 1 Step 5 – Continue to whip stitch through the back loops of squares 1 and 2 until all stitches of both edges have been sewn together. If you have two chains at the corner of each square, only one chain on each side should be joined. See the section of ‘Crochet Square Anatomy’ if you need more detail. Every 4cm or so, pull the two yarn ends together to ‘zip up’ the whip stitches.
Join 1 Step 6 – If you are joining more squares, simply work through Steps 1-5 with the next two squares, using the same yarn that is attached to the first two squares. If there is too much yarn showing between the sets of squares, you can hold the yarn at the top and shimmy the newly added squares down a little to close the gap.
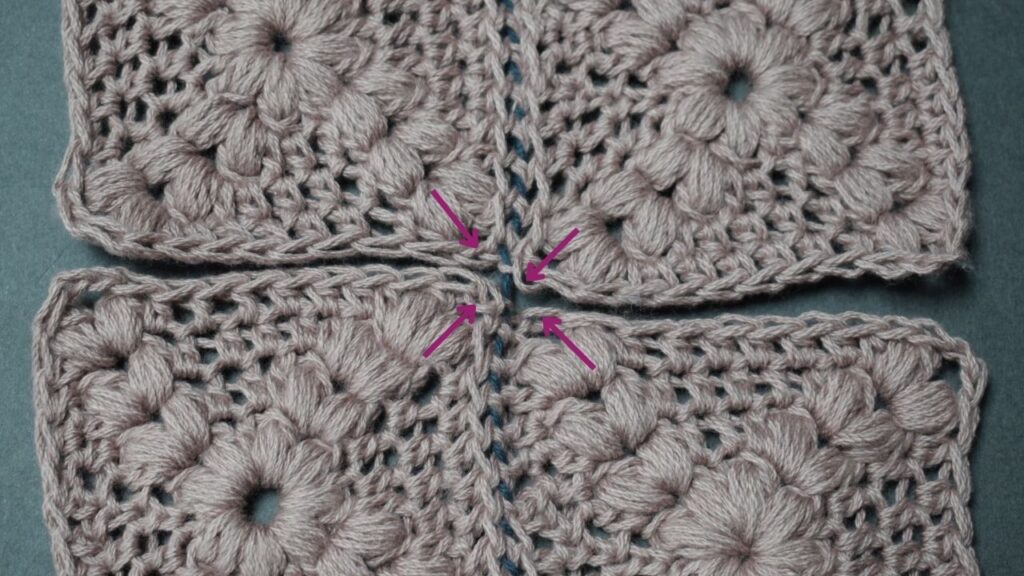
Join 2 Step 7 – You should be able to easily identify the unworked corner chain stitches. These will be whip stitched together during Join 2.
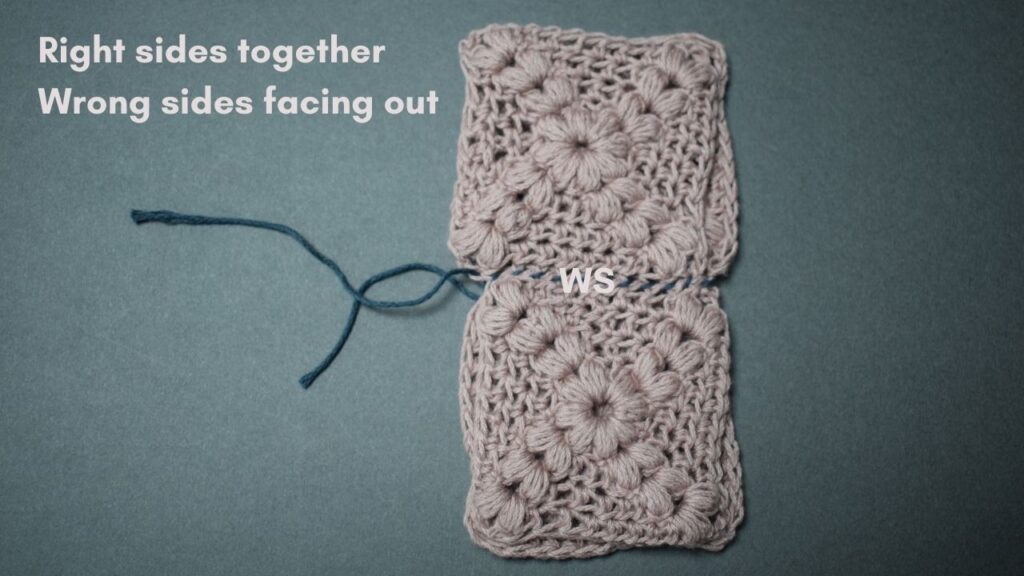
Join 2 Step 8 – With right sides of squares together and wrong sides are facing out, fold the squares to create a long edge on unjoined crochet.
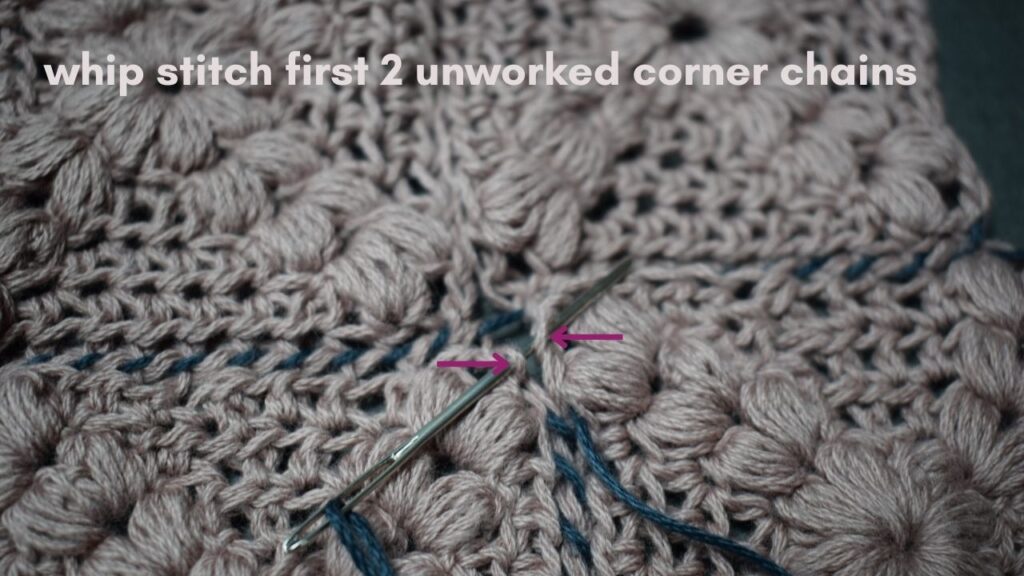
Join 2 Step 9 – Repeat Steps 3 – 5 working up the seam of the first two squares. Make sure you only whip stitch the unworked corner chains of the first two centre squares.
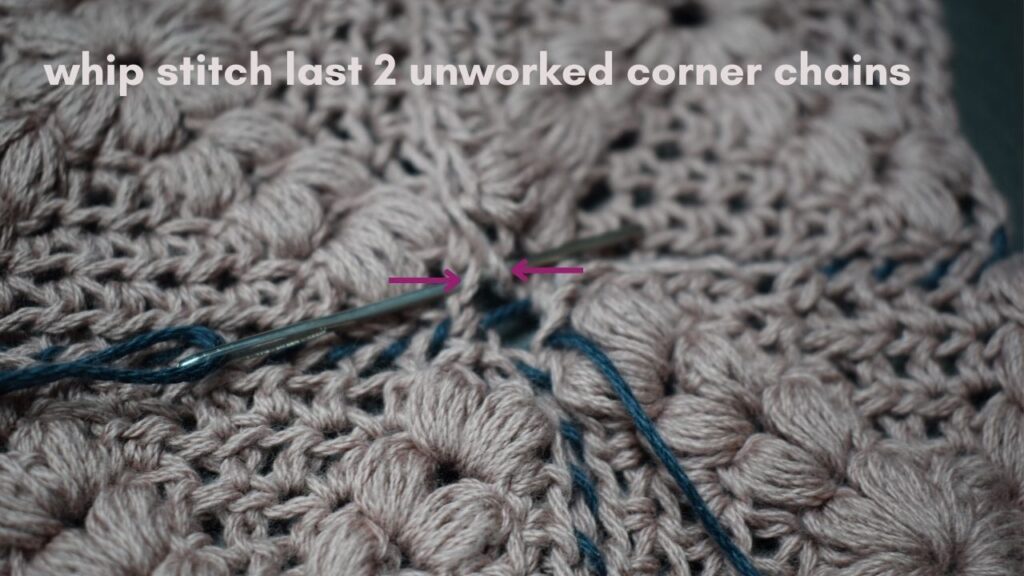
Join 2 Step 10 – Next, whip stitch the last two unworked corner chains of the last two centre squares.
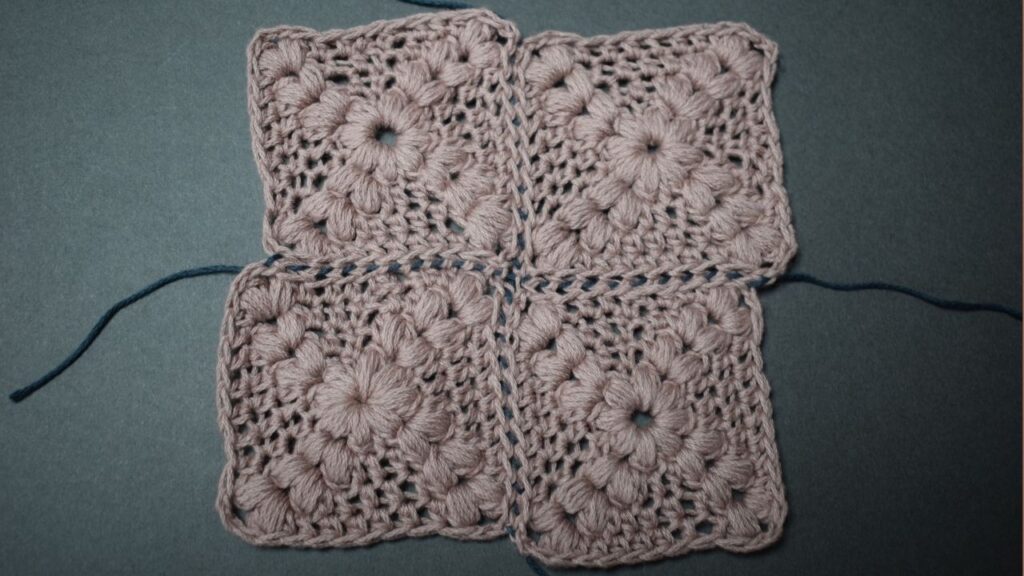
Join 2 Step 11 – Continue to whip stitch up the two seams until all stitches have been used. Depending on what you are doing with the squares, you may or may not want to whip stitch both corner chains at the end of the joins. If you are adding a border or combining with another piece of crochet there is no need – the unworked chains will be used for that join and will become neat.
Crochet Square Joining Anatomy
If your squares have been crocheted in the round (as a right handed crocheter), the top of your stitches will be leaning slightly to the right.
When you come to join squares together, this can make it tricky to work out which stitch is which, especially at the corner chains. The following annotated photos show you what to look for, so you can make, neat and accurate joins for your crocheted squares and motifs.

Four crocheted squares are joined together using two join lines.

A square crocheted in the round would usually have two corner chains. One from each square is used in Join 1 and one from each square will later be used in Join 2.

When you are combining four squares, it’s important to recognise which corner chains will be used in which join. If you get it right, your four joined squares will create a neat cross in the centre.


Prefer a Video Tutorial?
If you would prefer a quick video tutorial, I have one here for you.
Other Useful Tutorials
- Mattress Stitch Crochet Squares, Motifs & Seams is here as a video tutorial, OR here as a photo tutorial.
- Zig-Zag Stitch Crochet Squares, Motifs & Seams is here here as a video tutorial, OR here as a photo tutorial.
Patterns Shown in This Tutorial
- Isla Bag uses the crocheted squares shown in this tutorial.